Download Microsoft Azure Security Technologies.AZ-500.CertDumps.2024-08-21.308q.vcex
| Vendor: | Microsoft |
| Exam Code: | AZ-500 |
| Exam Name: | Microsoft Azure Security Technologies |
| Date: | Aug 21, 2024 |
| File Size: | 18 MB |
| Downloads: | 12 |
How to open VCEX files?
Files with VCEX extension can be opened by ProfExam Simulator.
Discount: 20%

Demo Questions
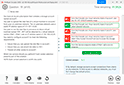
Question 1
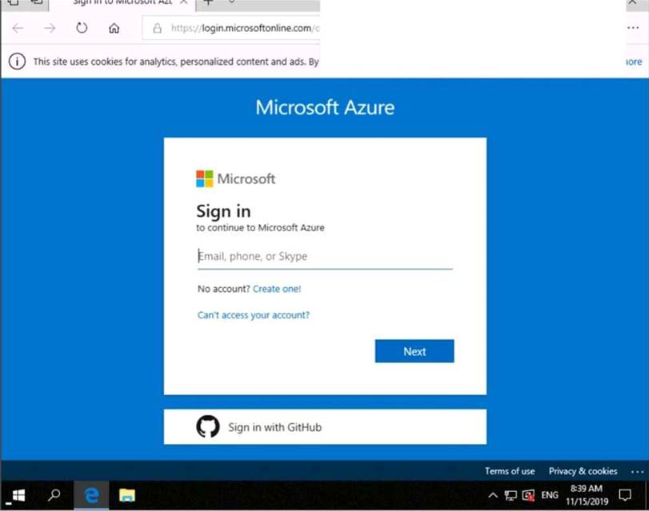
Please wait while the virtual machine loads. Once loaded, you may proceed to the lab section. This may take a few minutes, and the wait time will not be deducted from your overall test time. Use the following login credentials as needed: To enter your username, place your cursor in the Sign in box and click on the username below. To enter your password, place your cursor in the Enter password box and click on the password below. Azure Username: . Azure Password: XXXXXXXX. The following information is for technical support purposes only: Lab Instance: 12345678. You need to prevent administrative users from accidentally deleting a virtual network named VNET1. The administrative users must be allowed to modify the settings of VNET1. To complete this task, sign in to the Azure portal. This task might take several minutes to complete. You can perform other tasks while the task completes.
- See the explanation
Correct answer: A
Explanation:
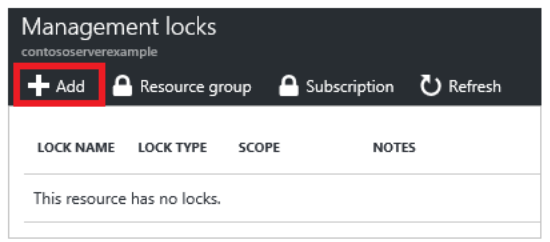
1. In the Settings blade for virtual network VNET, select Locks. 2. To add a lock, select Add. 3. For Lock type select Delete lock, and click OK. 1. In the Settings blade for virtual network VNET, select Locks. 2. To add a lock, select Add. 3. For Lock type select Delete lock, and click OK.

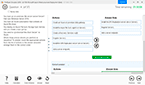
Question 2
Please wait while the virtual machine loads. Once loaded, you may proceed to the lab section. This may take a few minutes, and the wait time will not be deducted from your overall test time. Use the following login credentials as needed: To enter your username, place your cursor in the Sign in box and click on the username below. To enter your password, place your cursor in the Enter password box and click on the password below. Azure Username: . Azure Password: XXXXXXXX. The following information is for technical support purposes only: Lab Instance: 12345678. The developers at your company plan to create a web app named App10598168 and to publish the app to . The developers at your company plan to create a web app named App12345678 and to publish the app to . You need to perform the following tasks: Ensure that App12345678 is registered to Azure Active Directory (Azure AD). Generate a password for App12345678. To complete this task, sign in to the Azure portal. This task might take several minutes to complete. You can perform other tasks while the task completes.
- See the explanation
Correct answer: A
Explanation:
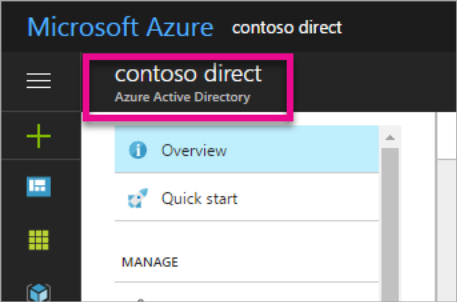
1. Sign in to your Azure Account through the Azure portal. 2. Select Azure Active Directory. 3. Select App registrations. 4. Select New registration. 5. Name the application 12345678. Select a supported account type, which determines who can use the application. Under Redirect URI, select Web for the type of application you want to create. Enter the URI: https://www.contoso.com, where the access token is sent to. 6. Click Register. 7. Select Certificates & secrets. 8. Select Client secrets -> New client secret. 9. Provide a description of the secret, and a duration. When done, select Add. 10. After saving the client secret, the value of the client secret is displayed. Copy this value because you aren't able to retrieve the key later. You provide the key value with the application ID to sign in as the application. Store the key value where your application can retrieve it. 1. Sign in to your Azure Account through the Azure portal.
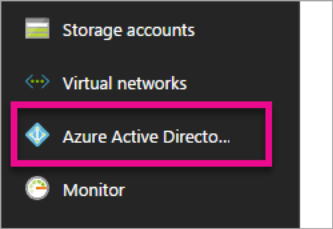
2. Select Azure Active Directory.
3. Select App registrations.
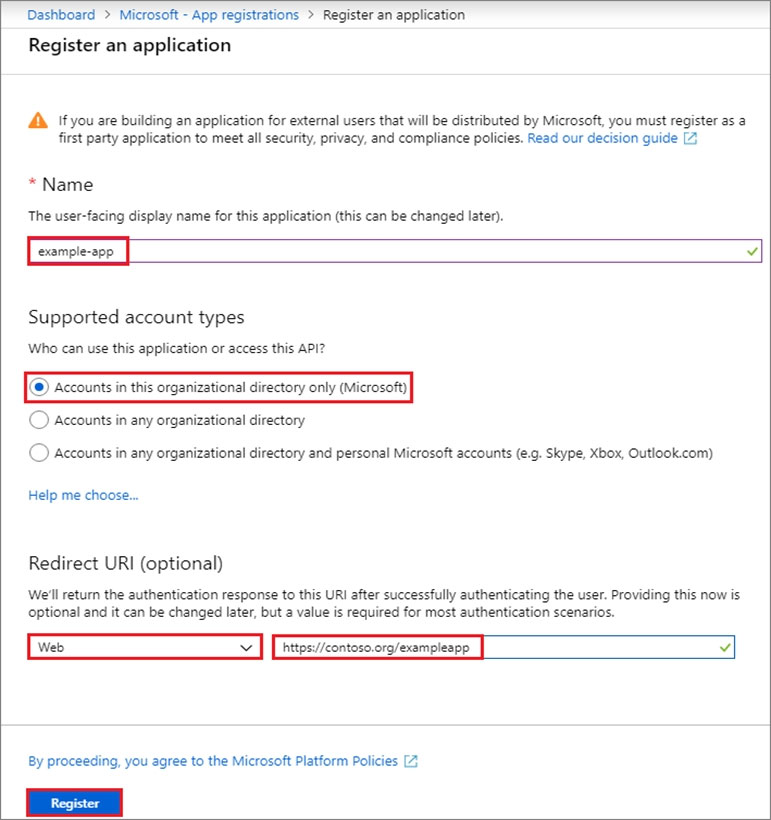
4. Select New registration.
5. Name the application 12345678. Select a supported account type, which determines who can use the application. Under Redirect URI, select Web for the type of application you want to create. Enter the URI: https://www.contoso.com, where the access token is sent to.
6. Click Register.
7. Select Certificates & secrets.
8. Select Client secrets -> New client secret.
9. Provide a description of the secret, and a duration. When done, select Add.
10. After saving the client secret, the value of the client secret is displayed.
Copy this value because you aren't able to retrieve the key later. You provide the key value with the application ID to sign in as the application. Store the key value where your application can retrieve it.
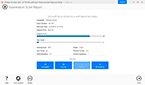
Question 3
Please wait while the virtual machine loads. Once loaded, you may proceed to the lab section. This may take a few minutes, and the wait time will not be deducted from your overall test time. Use the following login credentials as needed: To enter your username, place your cursor in the Sign in box and click on the username below. To enter your password, place your cursor in the Enter password box and click on the password below. Azure Username: . Azure Password: XXXXXXXX. The following information is for technical support purposes only: Lab Instance: 12345678. You need to email an alert to a user named if the average CPU usage of a virtual machine named VM1 is greater than 70 percent for a period of 15 minutes. To complete this task, sign in to the Azure portal. This task might take several minutes to complete. You can perform other tasks while the task completes.
- See the explanation
Correct answer: A
Explanation:
1. In the portal, locate the resource, here VM1, you are interested in monitoring and select it. Select Alerts under the MONITORING section. Select New alert rule. Fill in Condition, Actions, Alert rule details. Click Create alert rule. 1. In the portal, locate the resource, here VM1, you are interested in monitoring and select it. Select Alerts under the MONITORING section. Select New alert rule. Fill in Condition, Actions, Alert rule details. Click Create alert rule.
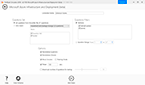
Question 4
Please wait while the virtual machine loads. Once loaded, you may proceed to the lab section. This may take a few minutes, and the wait time will not be deducted from your overall test time. Use the following login credentials as needed: To enter your username, place your cursor in the Sign in box and click on the username below. To enter your password, place your cursor in the Enter password box and click on the password below. Azure Username: . Azure Password: XXXXXXXX. The following information is for technical support purposes only: Lab Instance: 12345678. You need to create a new Azure Active Directory (Azure AD) directory named 12345678.onmicrosoft.com. The new directory must contain a user named user12345678 who is configured to sign in by using Azure Multi-Factor Authentication (MFA). To complete this task, sign in to the Azure portal. This task might take several minutes to complete. You can perform other tasks while the task completes.
- See the explanation
Correct answer: A
Explanation:
1. Browse to the Azure portal and sign in with an account that has an Azure subscription. 2. Select the plus icon (+) and search for Azure Active Directory. 3. Select Azure Active Directory in the search results. 4. Select Create. 5. Provide an Organization name (12345678) and an Initial domain name (12345678). Then select Create. This will create the directory named 12345678.onmicrosoft.com. 6. After directory creation is complete, select the information box to manage your new directory. 7. In the Azure portal, make sure you are on the Azure Active Directory fly out. If not, select the Azure Active Directory icon from the left services navigation. 8. Under Manage, select Users. 9. Select All users and then select + New user. 10. Provide a Name and User name (user12345678) for the user. When you're done, select Create. 11. In the Azure portal, make sure you are on the Azure Active Directory fly out. If not, select the Azure Active Directory icon from the left services navigation. 12. Under Manage, select Users. 13. Click on the Multi-Factor Authentication link. 14. Tick the checkbox next to the user's name and click the Enable link. 1. Browse to the Azure portal and sign in with an account that has an Azure subscription.
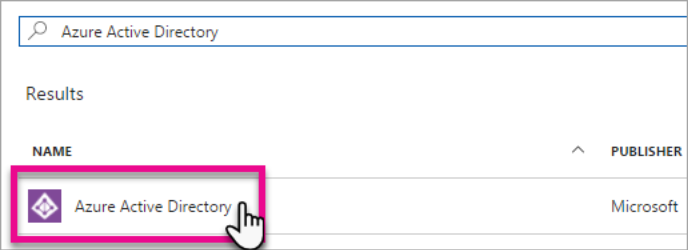
2. Select the plus icon (+) and search for Azure Active Directory.
3. Select Azure Active Directory in the search results.
4. Select Create.
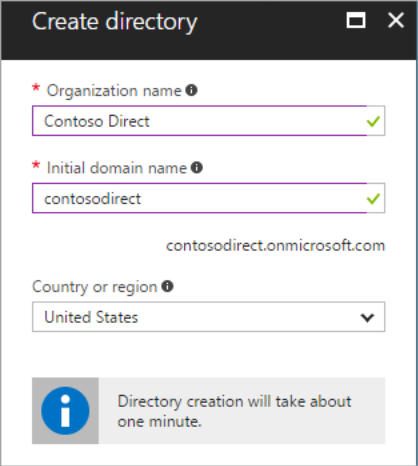
5. Provide an Organization name (12345678) and an Initial domain name (12345678). Then select Create. This will create the directory named 12345678.onmicrosoft.com.
6. After directory creation is complete, select the information box to manage your new directory.
7. In the Azure portal, make sure you are on the Azure Active Directory fly out. If not, select the Azure Active Directory icon from the left services navigation.
8. Under Manage, select Users. 9. Select All users and then select + New user.
10. Provide a Name and User name (user12345678) for the user. When you're done, select Create.
11. In the Azure portal, make sure you are on the Azure Active Directory fly out. If not, select the Azure Active Directory icon from the left services navigation.
12. Under Manage, select Users.
13. Click on the Multi-Factor Authentication link.
14. Tick the checkbox next to the user's name and click the Enable link.


Question 5
Please wait while the virtual machine loads. Once loaded, you may proceed to the lab section. This may take a few minutes, and the wait time will not be deducted from your overall test time. Use the following login credentials as needed: To enter your username, place your cursor in the Sign in box and click on the username below. To enter your password, place your cursor in the Enter password box and click on the password below. Azure Username: . Azure Password: XXXXXXXX. The following information is for technical support purposes only: Lab Instance: 12345678. You need to ensure that only devices connected to a 131.107.0.0/16 subnet can access data in the rg1lod1234578 Azure Storage account. To complete this task, sign in to the Azure portal. This task might take several minutes to complete. You can perform other tasks while the task completes.
- See the explanation
Correct answer: A
Explanation:
1. Go to the storage account. 2. Under 'Security + networking' SELECT 'Networking'. 2. Select 'Firewalls and virtual networks' on the top (next to Custom domain). 3. Under Public network access, CHOOSE the 'Enable from selected virtual network and IP addresses RADIO button. 4. Under 'Virtual networks' add existing virtual network. 5. Add the network with the CIDR. 1. Go to the storage account.
2. Under 'Security + networking' SELECT 'Networking'.
2. Select 'Firewalls and virtual networks' on the top (next to Custom domain).
3. Under Public network access, CHOOSE the 'Enable from selected virtual network and IP addresses RADIO button.
4. Under 'Virtual networks' add existing virtual network.
5. Add the network with the CIDR.
Question 6
Please wait while the virtual machine loads. Once loaded, you may proceed to the lab section. This may take a few minutes, and the wait time will not be deducted from your overall test time. Use the following login credentials as needed: To enter your username, place your cursor in the Sign in box and click on the username below. To enter your password, place your cursor in the Enter password box and click on the password below. Azure Username: . Azure Password: XXXXXXXX. The following information is for technical support purposes only: Lab Instance: 12345678. You need to collect all the audit failure data from the security log of a virtual machine named VM1 to an Azure Storage account. To complete this task, sign in to the Azure portal. This task might take several minutes to complete. You can perform other tasks while the task completes.
- See the explanation
Correct answer: A
Explanation:
1. Go to VM. 2. Diagnostic Settings. 3. Enable it. 4. Point to storage account. 5. Under Logs check (Security > Audit Failure) is ticked. 1. Go to VM.
2. Diagnostic Settings.
3. Enable it.
4. Point to storage account.
5. Under Logs check (Security > Audit Failure) is ticked.
Question 7
Please wait while the virtual machine loads. Once loaded, you may proceed to the lab section. This may take a few minutes, and the wait time will not be deducted from your overall test time. Use the following login credentials as needed: To enter your username, place your cursor in the Sign in box and click on the username below. To enter your password, place your cursor in the Enter password box and click on the password below. Azure Username: . Azure Password: XXXXXXXX. The following information is for technical support purposes only: Lab Instance: 12345678. You need to configure Azure to allow RDP connections from the Internet to a virtual machine named VM1. The solution must minimize the attack surface of VM1.To complete this task, sign in to the Azure portal. This task might take several minutes to complete. You can perform other tasks while the task completes.
- See the explanation
Correct answer: A
Explanation:
1. Sign in to the Azure portal.2. In Virtual Machines, select VM1. 3. In Settings, select Networking. 4. In Inbound port rules, check whether the port for RDP is set correctly. The following is an example of the configuration: Priority: 300. Name: Port_3389. Port(Destination): 3389. Protocol: TCP. Source: Service Tag - Internet. Destinations: Any. Action: Allow. 1. Sign in to the Azure portal.
2. In Virtual Machines, select VM1.
3. In Settings, select Networking.
4. In Inbound port rules, check whether the port for RDP is set correctly.
The following is an example of the configuration: Priority: 300. Name: Port_3389. Port(Destination): 3389. Protocol: TCP. Source: Service Tag - Internet. Destinations: Any. Action: Allow.
Question 8
Please wait while the virtual machine loads. Once loaded, you may proceed to the lab section. This may take a few minutes, and the wait time will not be deducted from your overall test time. Use the following login credentials as needed: To enter your username, place your cursor in the Sign in box and click on the username below. To enter your password, place your cursor in the Enter password box and click on the password below. Azure Username: . Azure Password: XXXXXXXX. The following information is for technical support purposes only: Lab Instance: 12345678. You need to add the network interface of a virtual machine named VM1 to an application security group named ASG1. To complete this task, sign in to the Azure portal. This task might take several minutes to complete. You can perform other tasks while the task completes.
- See the explanation
Correct answer: A
Explanation:
1. In the Search resources, services, and docs box at the top of the portal, begin typing the name of a virtual machine that has a network interface that you want to add to, or remove from, an application security group. When the name of your VM appears in the search results, select it. 2. Under SETTINGS, select Networking. Select Application Security Groups then Configure the application security groupselect the application security groups that you want to add the network interface to, or unselect the application security groups that you want to remove the network interface from, and then select Save. Only network interfaces that exist in the same virtual network can be added to the same application security group. The application security group must exist in the same location as the network interface. 1. In the Search resources, services, and docs box at the top of the portal, begin typing the name of a virtual machine that has a network interface that you want to add to, or remove from, an application security group. When the name of your VM appears in the search results, select it.
2. Under SETTINGS, select Networking. Select Application Security Groups then Configure the application security groupselect the application security groups that you want to add the network interface to, or unselect the application security groups that you want to remove the network interface from, and then select Save. Only network interfaces that exist in the same virtual network can be added to the same application security group. The application security group must exist in the same location as the network interface.
Question 9
Please wait while the virtual machine loads. Once loaded, you may proceed to the lab section. This may take a few minutes, and the wait time will not be deducted from your overall test time. Use the following login credentials as needed: To enter your username, place your cursor in the Sign in box and click on the username below. To enter your password, place your cursor in the Enter password box and click on the password below. Azure Username: . Azure Password: XXXXXXXX. The following information is for technical support purposes only: Lab Instance: 12345678. You need to ensure that a user named user2-12345678 can manage the properties of the virtual machines in the RG1lod12345678 resource group. The solution must use the principle of least privilege. To complete this task, sign in to the Azure portal. This task might take several minutes to complete. You can perform other tasks while the task completes.
- See the explanation
Correct answer: A
Explanation:
1. Sign in to the Azure portal. 2. Browse to Resource Groups. 3. Select the RG1lod12345678 resource group. 4. Select Access control (IAM). 5. Select Add > role assignment. 6. Select Virtual Machine Contributor (you can filter the list of available roles by typing 'virtual' in the search box) then click Next. 7. Select the +Select members option and select user2-12345678 then click the Select button. 8. Click the Review + assign button twice. 1. Sign in to the Azure portal.
2. Browse to Resource Groups.
3. Select the RG1lod12345678 resource group.
4. Select Access control (IAM). 5. Select Add > role assignment.
6. Select Virtual Machine Contributor (you can filter the list of available roles by typing 'virtual' in the search box) then click Next.
7. Select the +Select members option and select user2-12345678 then click the Select button.
8. Click the Review + assign button twice.
Question 10
Please wait while the virtual machine loads. Once loaded, you may proceed to the lab section. This may take a few minutes, and the wait time will not be deducted from your overall test time. Use the following login credentials as needed: To enter your username, place your cursor in the Sign in box and click on the username below. To enter your password, place your cursor in the Enter password box and click on the password below. Azure Username: . Azure Password: XXXXXXXX. The following information is for technical support purposes only: Lab Instance: 12345678. You need to ensure that the rg1lod1234578n1 Azure Storage account is encrypted by using a key stored in the KeyVault12345678 Azure Key Vault. To complete this task, sign in to the Azure portal. This task might take several minutes to complete. You can perform other tasks while the task completes.
- See the explanation
Correct answer: A
Explanation:
1. Go to Storage Accounts. 2. Click on your storage account. 3. In the search box type encryption and select it. 4. From the encryption page select Customer-managed keys. 5. And then click the link to select a key vault and key. 6. A new page opens and then you select the appropriate key vault and key. 1. Go to Storage Accounts.
2. Click on your storage account.
3. In the search box type encryption and select it.
4. From the encryption page select Customer-managed keys.
5. And then click the link to select a key vault and key.
6. A new page opens and then you select the appropriate key vault and key.
HOW TO OPEN VCE FILES
Use VCE Exam Simulator to open VCE files
HOW TO OPEN VCEX AND EXAM FILES
Use ProfExam Simulator to open VCEX and EXAM files
ProfExam at a 20% markdown
You have the opportunity to purchase ProfExam at a 20% reduced price
Get Now!